
Essential Tools for Trim Carpentry and Tongue and Groove Installation
A useful trim-carpentry and tongue-and-groove tool kit is built around the work, not around a brand wall. You need to control layout, make clean repeatable cuts, handle field corrections, fasten without beating up the board, and reach the work without fighting your setup. If a tool does not improve one of those jobs, it is probably an upgrade—not a first buy.
QUICK ANSWER
For a practical starter system, cover these roles first: tape and chalk-line layout, a dependable cut station, a mobile detail-cutting option, drilling and fastening, and stable access. Buy the role before the model. Corded, cordless, pneumatic, and battery tools can all be right depending on how often the tool runs, where you are standing, and how much setup is slowing the job.
LAYOUT AND CONTROL
Start with a tape measure, pencils, and a chalk line. Reference measurements and snapped control lines give you repeatable information across a ceiling or wall. A laser can help on some jobs, but it does not automatically replace the tape and chalk line.
The first course controls everything that follows. If the first few boards are already asking for little corrections, stop. Recheck the reference instead of carrying the error across the room. Bad layout makes good material look cheap, and perimeter trim cannot always hide it.
PRIMARY CUTTING
The main cutting station should give you clean, repeatable crosscuts without turning every board into a wrestling match. For most trim and T&G work, that means a properly set up miter-saw station with support for the stock. Capacity matters, but so do blade condition, alignment, work support, dust control, and how easily the station moves when the job changes.
A table saw or track-guided cutting system becomes valuable when you need controlled rips, starter boards, last-course reductions, or repeated width adjustments. It is not automatically a first purchase for every DIY job. Rent, borrow, or add that capability when the work actually requires it.
MOBILE AND DETAIL CUTTING
The cut station cannot solve every notch, outlet, beam, vent, or crooked intersection. A jigsaw or oscillating multi-tool handles field corrections and detail work that should not be forced through the main saw. The important part is control. Support the board, mark the waste side clearly, and test the fit before cutting a finished piece twice.
Detail tools save time when they prevent a trip back to the main station. They waste time when they become an excuse to freehand a cut that needed a reference or guide.
FASTENING AND ASSEMBLY
For real-wood T&G where stronger holding power is appropriate, I generally work in the 15-gauge finish-nailer lane. That is a field preference, not a universal rule. Fastener gauge, length, coating, angle, board thickness, profile, backing, environment, and the manufacturer’s instructions all have to agree with the actual assembly.
An 18-gauge brad nailer can still make sense for lighter trim, thin material, temporary positioning, or repair work when the holding demand allows it. The nailer is only part of the system. A drill/driver earns its keep for pilot holes, blocking, backers, trim supports, and the adjustments that keep the installation clean.
ACCESS AND SUPPORT
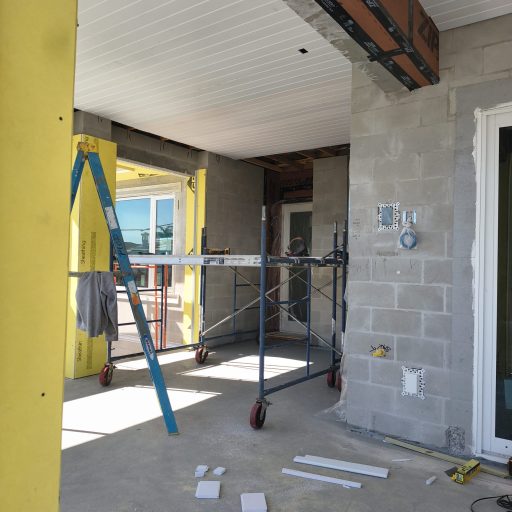
Ceiling work changes the tool decision because your body position becomes part of production. A platform, scaffold, plank, or properly selected ladder can matter more than another power tool. Stable access lets you hold the board, see the joint, keep the nailer under control, and move without stretching past a safe working position.
Choose access from the room, reach, duration, landing space, and manufacturer limits. A tool that feels fine at waist height can become an anchor after repeated overhead use.
Video: “How to Install Tongue and Groove Ceiling Boards” by WindsorONE.
POWER AND LOGISTICS
Cordless is useful when a cord or hose fights access, especially on platforms or when the work moves constantly. Corded can be the better production choice for sustained cutting, a fixed station, or when the lighter hand tool matters more than battery freedom. Pneumatic fastening can reduce hand weight, but the compressor and hose add their own setup and movement burden.
There is no honest universal winner. Build around the way the job flows. Keep chargers, batteries, cords, hoses, and the tools that support one another staged so you are not climbing down for every small change.
BUY-FIRST AND UPGRADE LOGIC
Buy in this order: layout control, primary cutting, drilling/fastening, detail cutting, and stable access. Add ripping capability, specialty holders, extra cordless platforms, or duplicate tools when a repeated frustration justifies them.
Rule of Thumb: Buy by recurring frustration. If the same problem keeps slowing the job, the upgrade has earned a serious look. A specialty tool that saves ten minutes once is not more valuable than a reliable tape, a straight control line, or a stable place to stand.
Need the full tongue-and-groove install sequence?
I put the planning, setup, layout, fastening, trim, mistakes, and checklists together in one PDF handbook so you are not piecing the job together one tip at a time.
VERDICT
The best starter kit is the leanest system that lets you measure, cut, fit, fasten, and reach the work without improvising every step. Choose tool families by role, then compare brands and models using verified specifications, ownership cost, portability, and the equipment you already carry.
For the complete ceiling-tool breakdown, continue to the comprehensive ceiling installation tools guide.